Audio
making noise

I love the idea of making music. Whether it's through traditional instruments, or through the manipulation of digital audio signals, the whole idea fascinates me.
I play a 5-string electric violin and the mandolin, and I'm always looking for new ways to bring the sound from those instruments (and anything else I can find!) to my ears.
HANDOLIN: BATCH TWO
2021-06-07 18:33:49
by: jovial_cynic
by: jovial_cynic

So... I listed my original six Handolin MIDI instruments on eBay and facebook, just to see what would happen, and in two days, they all sold out.
Clearly, I sold them too cheaply. I've ordered components to make more, and I'm increasing the price by $5. Because... why not?

I've had to start printing more cases. Based on my current print settings, these take about seven hours to print!

My next batch is a set of 30 of them. I've got a long ways to go!
comments [0]
VIOLIN/MANDOLIN MIDI CONTROLLER
2021-05-13 13:36:59
by: jovial_cynic
by: jovial_cynic
I've been working on a music project for a little while now, and a couple of months ago, I managed to complete the code for the Arduino Pro Micro microcontroller to bring this prototype to life.
Lots of electronic-music folks use a MIDI keyboard, bang out some keys, record it into their computer, and then mix with all kinds of electronic sounds. I've always wanted to do that, but I don't play the keyboard. I don't think about music through a keyboard. I do it through a violin or mandolin (they're the same strings). There's something about progressing up the strings in 5ths that just makes sense to me.
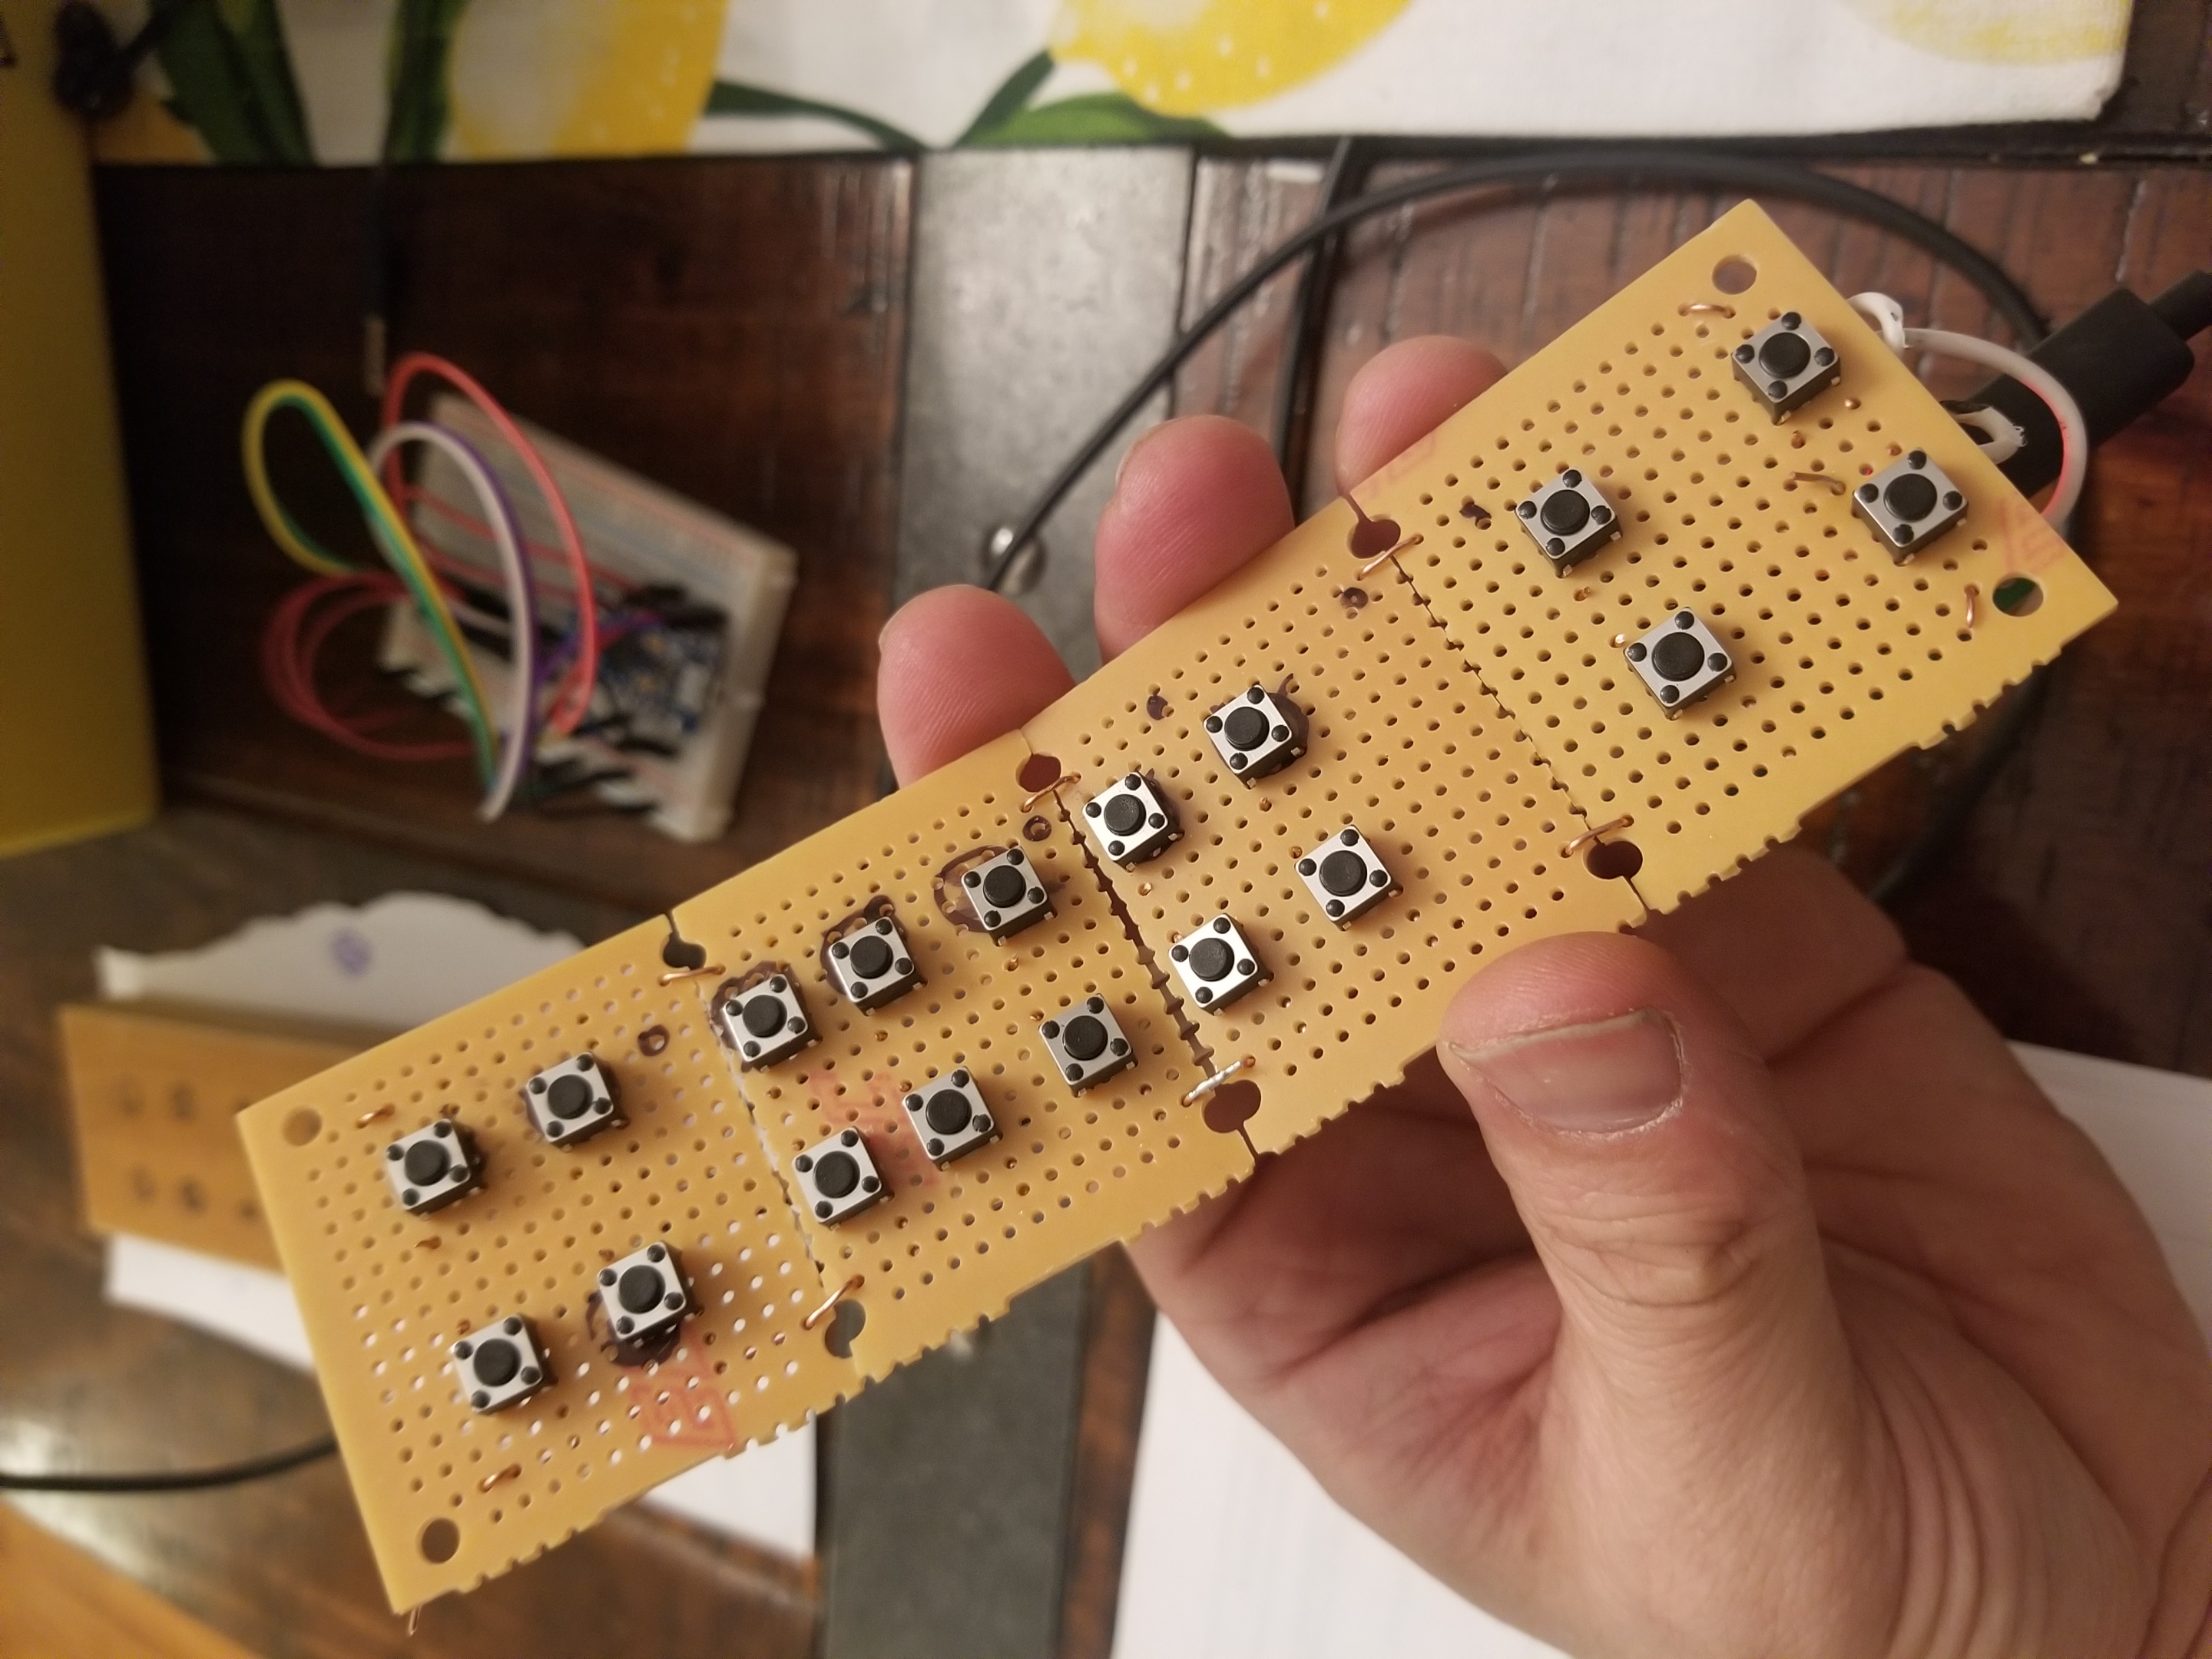
Anyhow, I couldn't find a violin-like MIDI controller anywhere, so I decided to code my own. Well, code, plus engineer the wiring, tie together some circuit boards, solder a bunch of wires together... and voila.
Here is the original prototype of the handheld violin/mandolin MIDI controller, or "Handolin":

Important note: This is an Arduino Pro Micro clone. It's in the family of the Arduino Leonardo. The normal Arduino is in the family of the UNO, and the UNO cannot be used as a MIDI controller as-is. You have to use a member of the Leonardo family, which uses the ATmega32u4 chip. You need this chip in order to have the Arduino function like an input device.
Anyhow, after getting the code correct, I finally got it built up to look more like the instrument I had in mind:

And... it works!
It's important to note that a strict MIDI instrument controller doesn't make sound. You have to play it through a sequencer or digital audio workstation (DAW). This controller is no different - you're hearing the audio because I'm playing it through the Reaper DAW, and I've chosen some weird space-strings kind of virtual instrument.
MIDI is really interesting. There's plenty of youtube tutorials on how it works, but on a basic level, the instrument controller sends the following data:
- Pitch (the actual note being played)
- NoteOn (the instruction to start playing the note at a particular volume or "velocity")
- NoteOff (the instruction to stop playing the note)
There's lots of other MIDI commands that can add other effects (like pitch blend, volume control, etc.), but I wanted my instrument controller to be as basic as possible. Just the notes.
Unlike a keyboard, where a sound is played when you press a key, a violin is a bowed instrument. If each note was a button on the instrument, the buttons wouldn't do anything unless the bow is played. Or, in the case of the Handolin, they don't do anything less the "string button" is pressed. The other reason this distinction is important is because you can play non-pressed strings on a violin - it's "open string" playing, and that's just a normal part of stringed instruments.
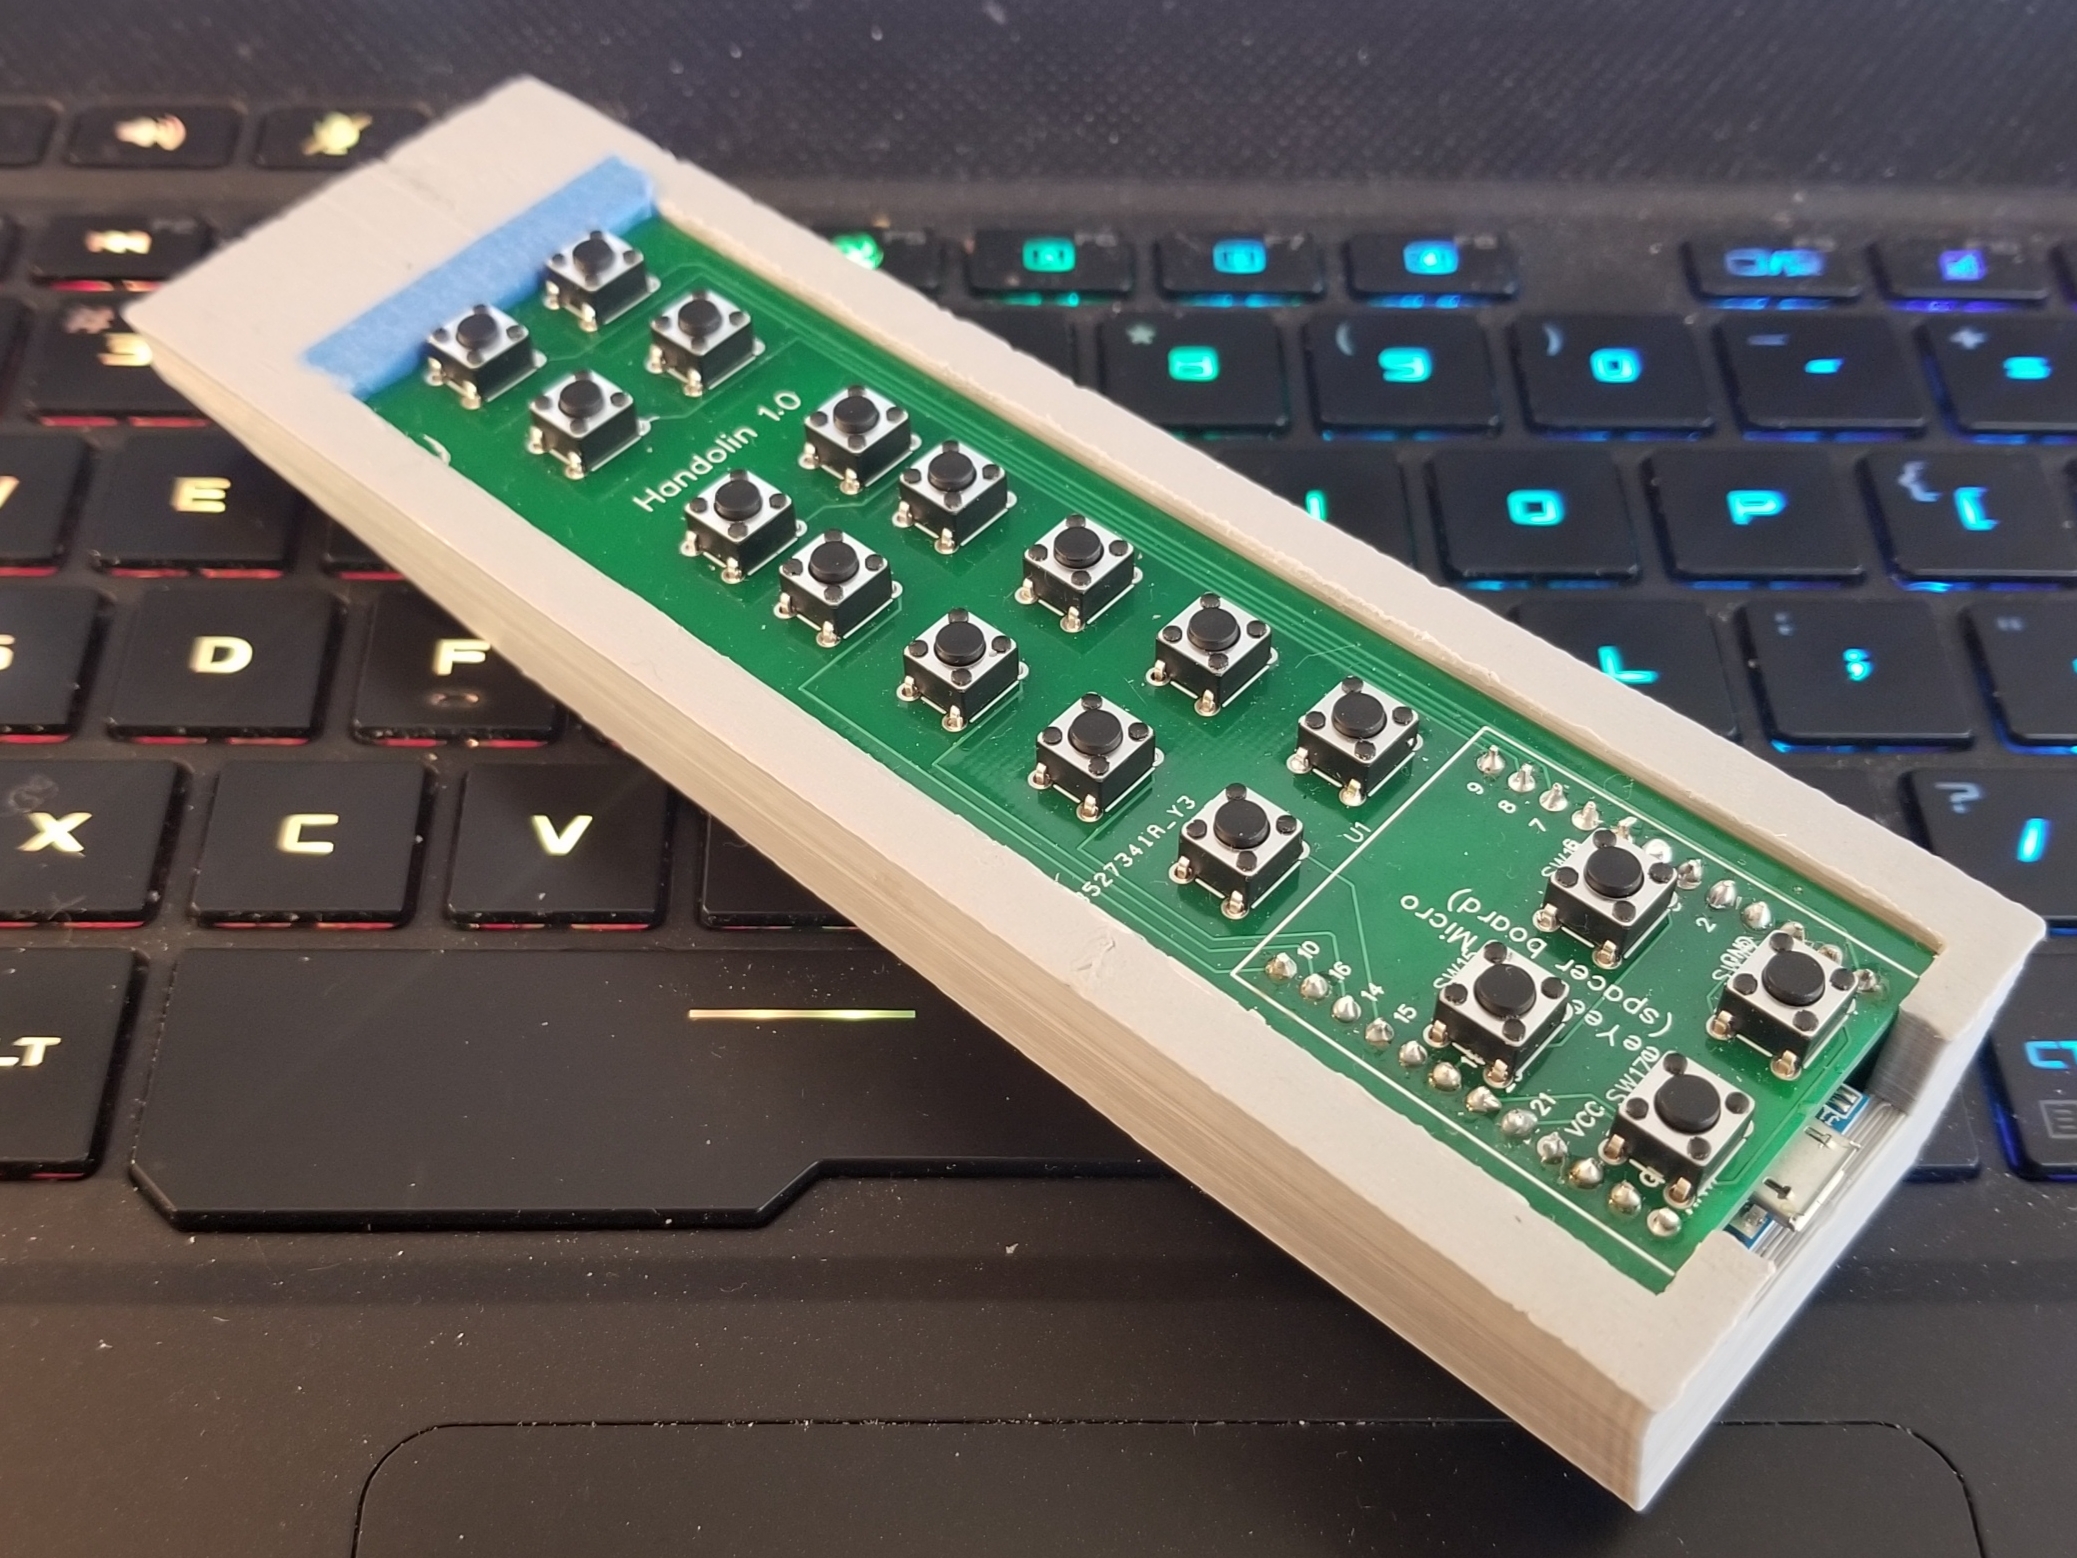
The other important design consideration is that a violin has 4 strings. The Handolin has 2 rows of buttons, which represent two strings. In order to access the remaining strings, I included buttons that let you shift between any two string pairs. The instrument defaults to D and A, but by toggling to the right, you get the A and E pairing. If you toggle to the left, it goes D-A, G-D, and also does a C-G pairing for the viola plays our there that like that low C.
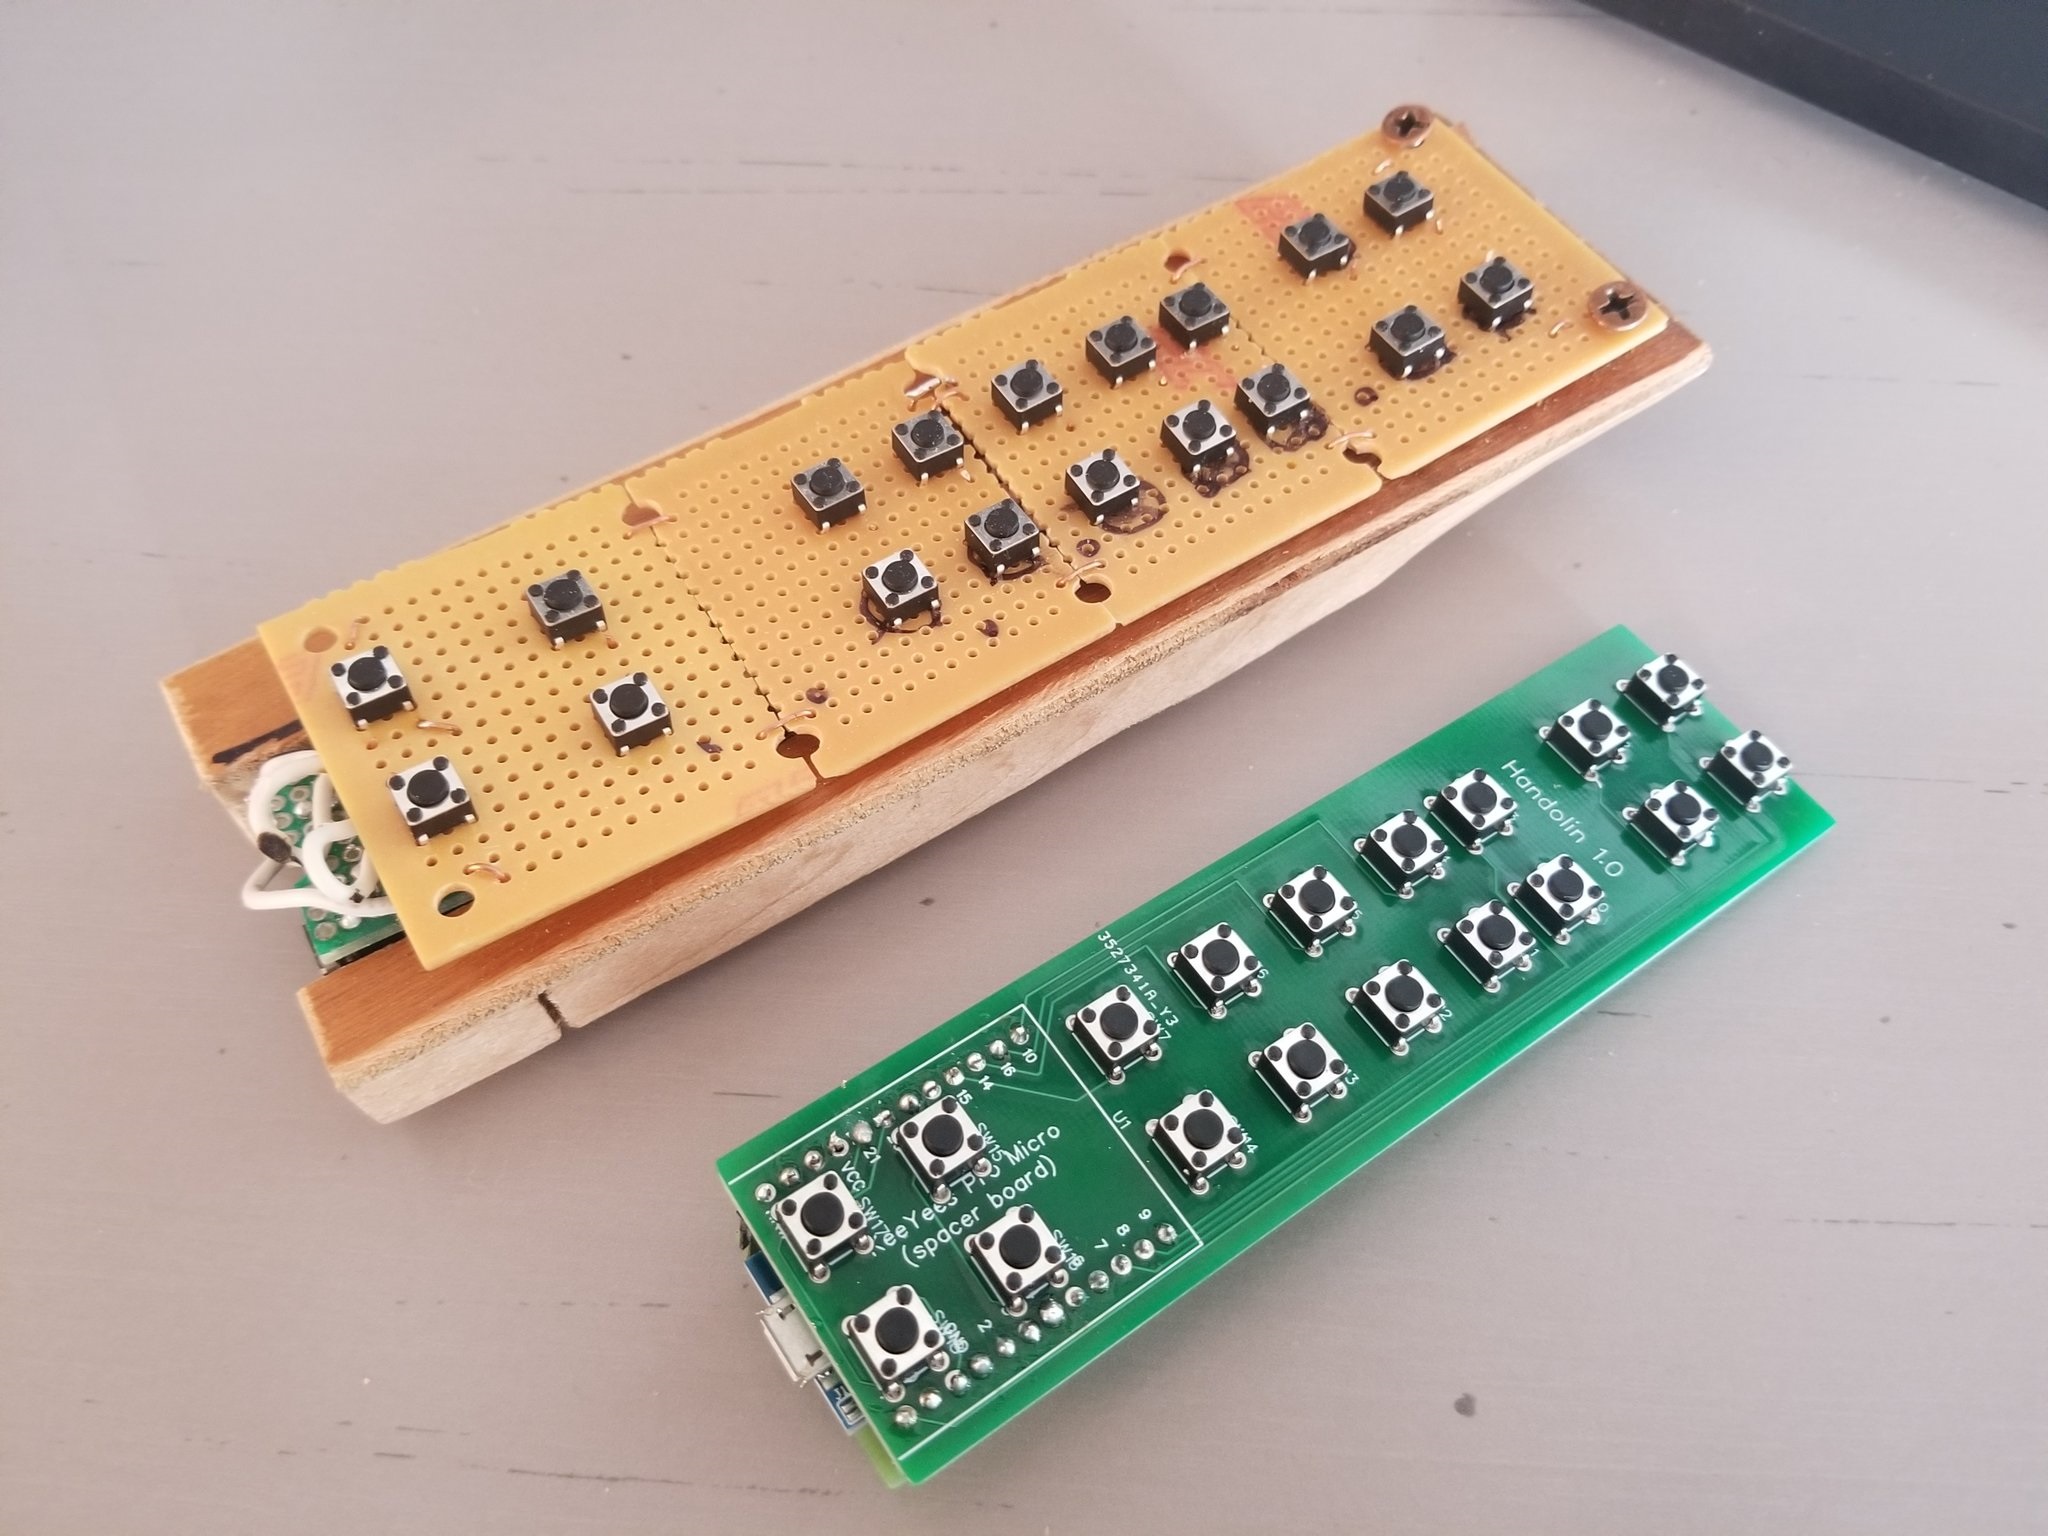
The next step was to make this thing look a little less... prototype-ish. So, I got into an online PCB designer and managed to come up with this bad boy:
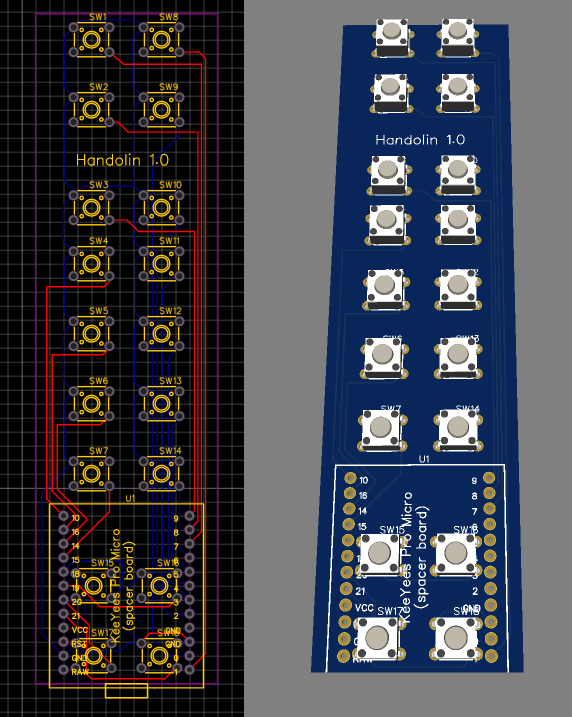

It's a two-part PCB, because the Arduino Pro Micro needs to basically sit exactly where the bottom 4 buttons are sitting. The only way to do that was to build a daughterboard with some posts that would allow the daughterboard to sit beneath the main PCB. And, after a bunch of design work and 3 weeks of waiting for shipping, I received these in the mail:

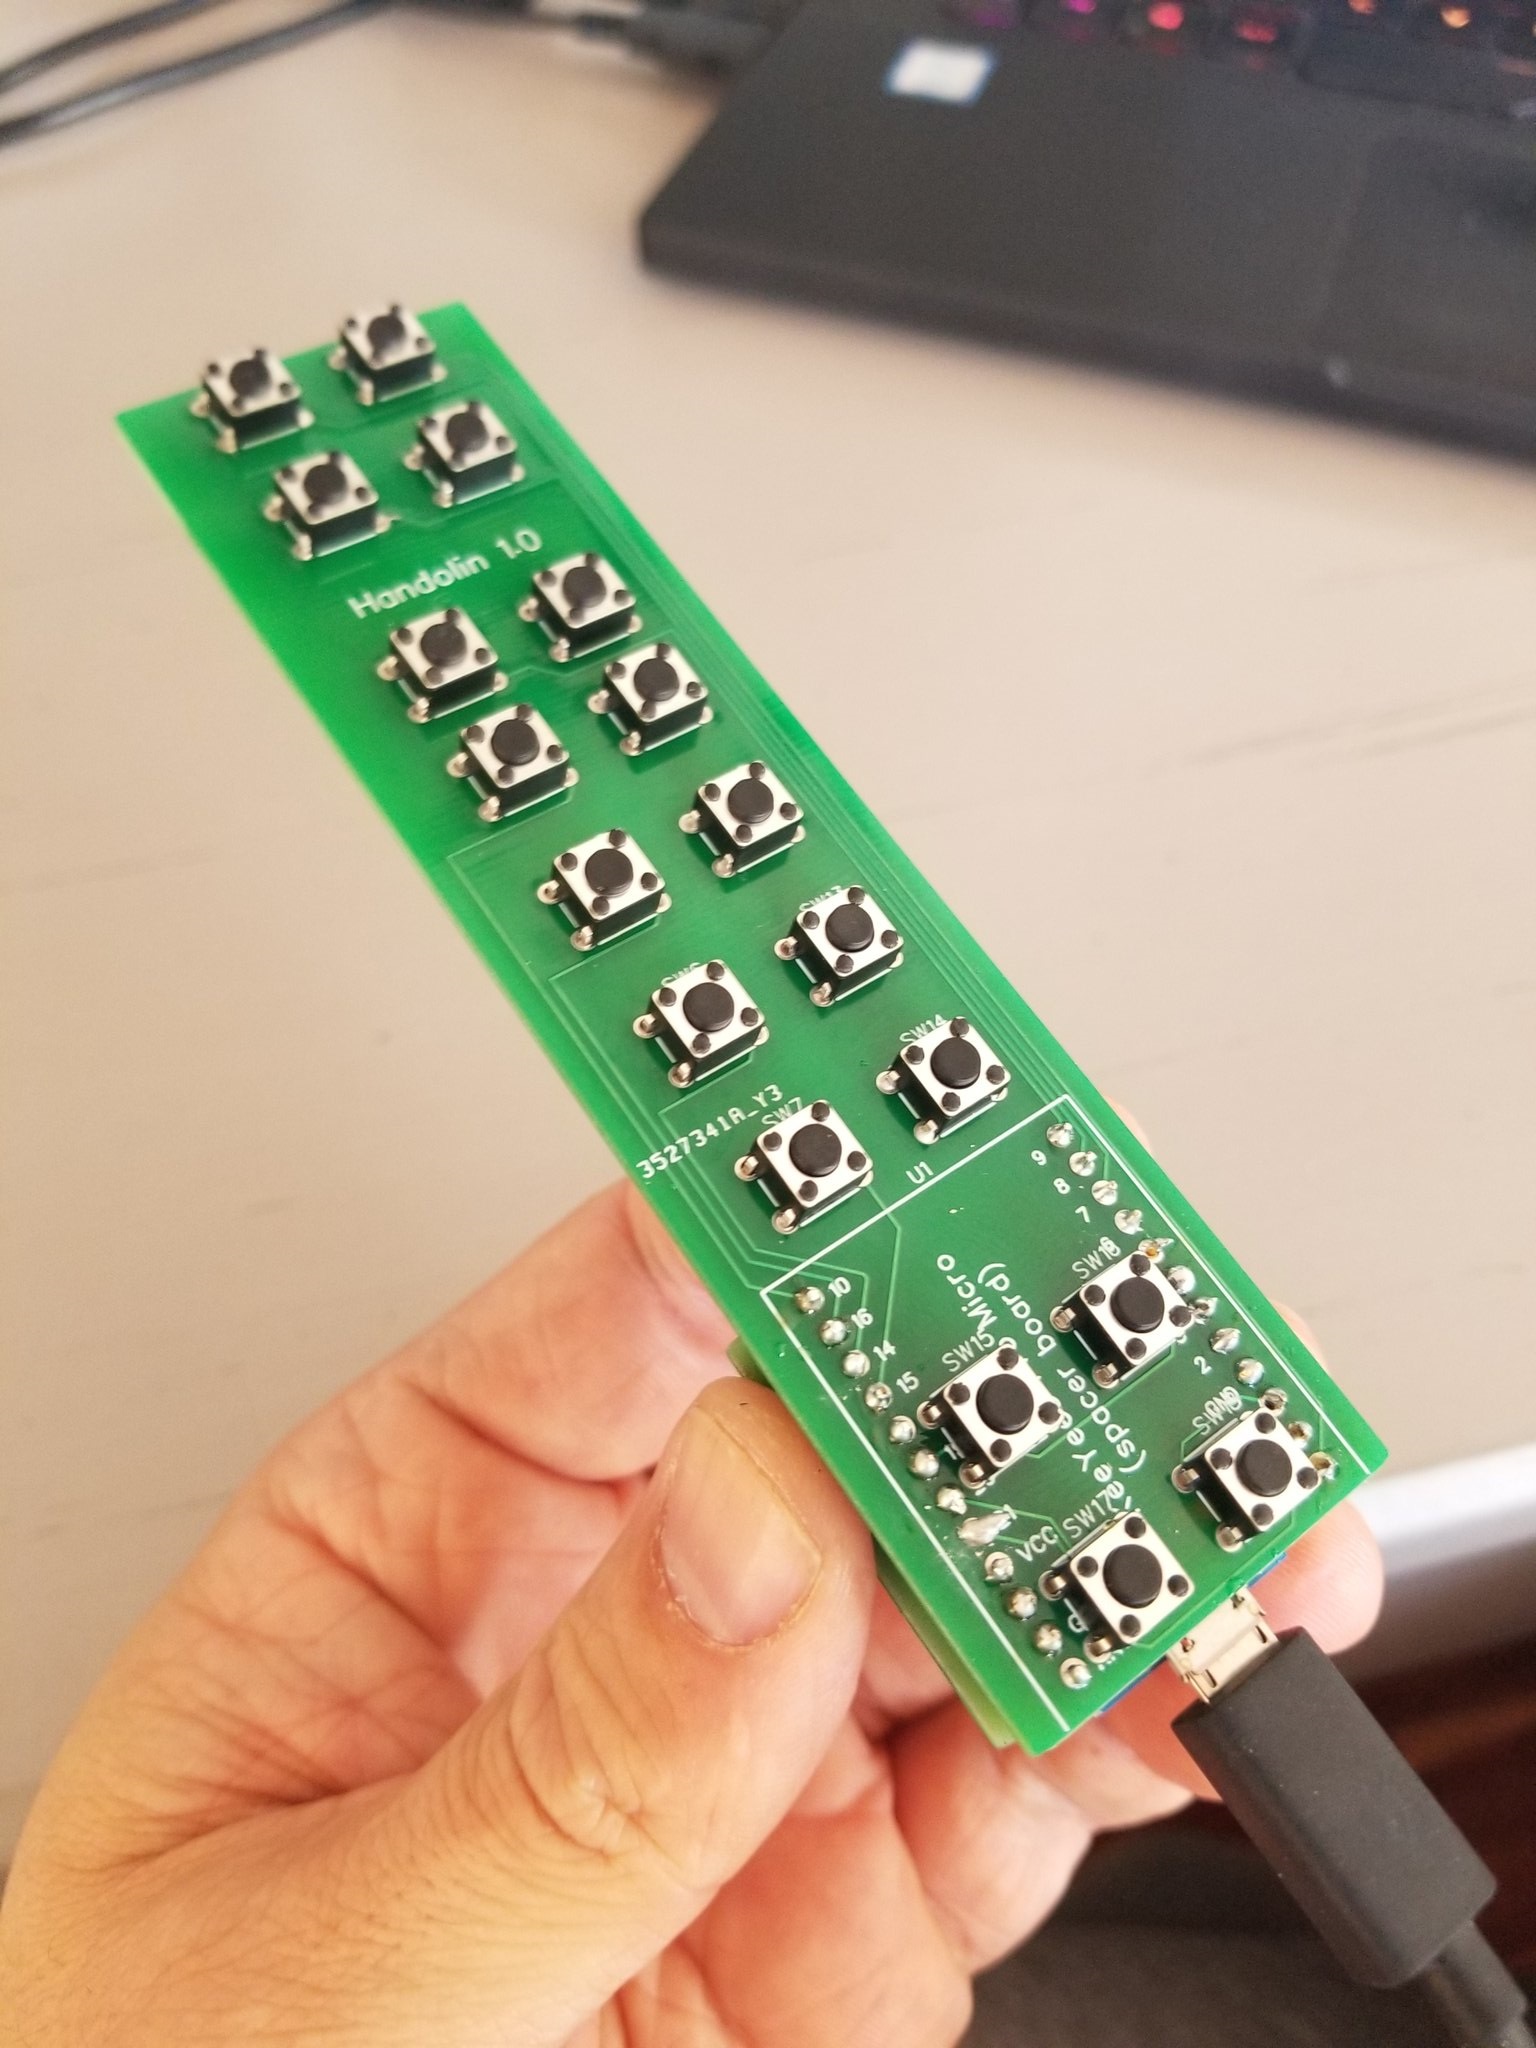

Look how much smaller it is than the original!
The next thing to do was to design a case to house the thing, so I got onto Blender and cooked this up:

I decided not to 3D print the scroll on there, just because I wanted to get it done faster, but the next one I print will definitely include it.
And here's the final result. Enjoy!
comments [0]
GUITAR FROM THE INSIDE
2011-07-24 16:35:24
by: jovial_cynic
by: jovial_cynic
Somebody thought to stick their iphone into a guitar to watch the strings being played from the inside. Amazing.
Note that the strings don't *actually* move that way. It's an effect of the rolling shutter. However, the visual effect is directly related to the note being played. amazing.
comments [0]
PAPERS
2010-04-10 21:27:39
by: jovial_cynic
by: jovial_cynic

Wauauauaua... Papers
Pardon the bit of foul language at the beginning. Once you get past that, you'll see the humor.
I nearly died laughing.
comments [2]
DOD VGS50 FIXED
2010-02-12 21:17:47
by: jovial_cynic
by: jovial_cynic
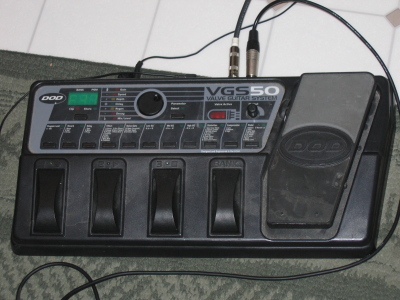
Back in 2007, I picked up this multi-effects board for a scant $10 and managed to get it working pretty quickly. One of the problems, however, is that the pedals didn't work consistently; the previous owner must have jumped repeatedly on the board, cracking the case and trashing the pedal supports. The only way to cycle through the different effects was to use the wheel, which wasn't useful for playing in a live setting.
I've been feeling a little stir crazy living with my in-laws while our house is being built, so I needed another project to keep myself busy. On top of that, I volunteered to start playing my violin and mandolin at the local church, and wanted to have my effects board in functional condition.
After fiddling around with ideas, I decided that the easiest way to give myself access to the pedals was to bolt down a plate of steel sheet metal and drill out some spots for button switches, and then rewire/bypass the existing switches to the new ones.
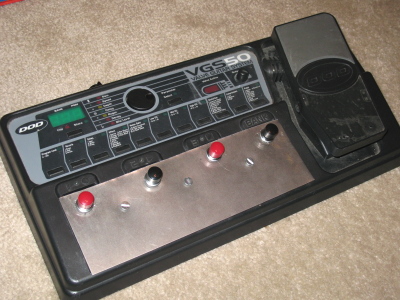
So that's exactly what I did. In case you're wondering, the buttons are mounted high on the plate intentionally. The plate is sloped, so if the buttons were mounted any lower, they'd actually dig into the circuit board below them.
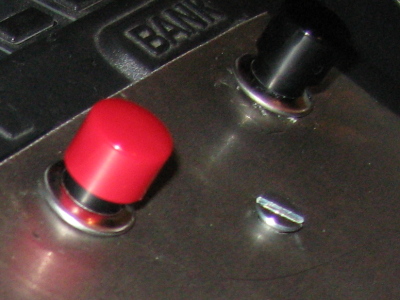
Here's a close-up of the new buttons mounted on the plate. The buttons are sturdy enough to handle light-to-medium tapping with shoes on, and I have no intention of jumping on the board.
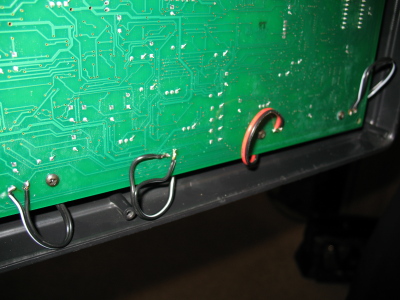
Here's the underside of the circuit board with the cover removed. You can see the new bypass wires soldered onto the spots where the stock switches are mounted.
comments [1]
2008-09-07: PROPANE HANK DRUM 2008-04-11: MAGIC OF MUSIC 2008-03-22: TIN CAN AMP 2008-03-16: MAKESHIFT AMP HEAD 2008-03-04: HACKING A BABY MONITOR: WIRELESS AMP 2007-11-20: MULTI-EFFECTS PROCESSOR 2007-11-11: ELECTRIC MOTOR PICKUP 2007-11-03: LITTLE GEM 2007-11-01: DIY EFFECTS PEDALS 2006-09-10: MIXMAN

