NEW THERMOSTAT
March 26, 2008
by: jovial_cynic
by: jovial_cynic
I've been meaning to replace the thermostat in our house for the last few months, and just this last weekend, Home Depot had some low-end thermostats for just $30. I figured that a cheap thermostat was a good enough incentive to get me make the swap.

Here's our old thermostat. It uses a coil-based temperature sensor, with a little mercury-filled tube switch. Twenty years ago, this one may have been accurate, but over time, the coils in these models lose tension.
The single most important step to follow when replacing a thermostat is that the wires need to be labeled. The packaging for the new thermostat made that quite clear; just about every page in the instruction manual mentioned it.
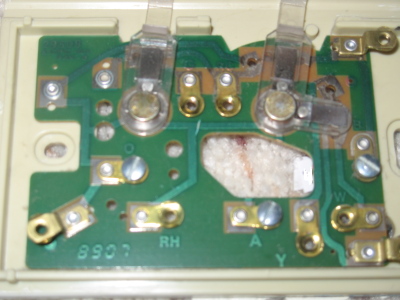
Here, you can see where the old thermostat circuit board is labeled. In this shot, you can easily see the RH, A, and the Y location. The wires going to these locations need to be labeled, as the colors of the wires have no bearing on anything; there apparently wasn't a universal wire-color scheme at the time these old thermostat were installed.
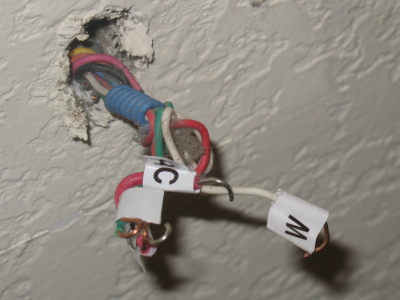
You can see that the wires here are labeled. It's also important that you prevent the wires from falling back into the wall. The manual suggested wrapping the wires around a pencil or stick. I tested my wires to see if they would sink in to the wall, but the way they were bundled prevented it.

The new thermostat has a location for each labeled wire. Very convenient. The unused terminals would be used if I had an air conditioner in the house.
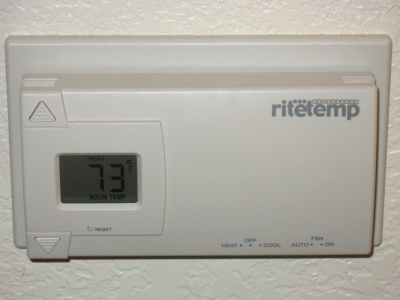
And here's the new panel, installed. It turns out that 70 degrees on the old thermostat equals about 73 degrees (maybe as high as 74 or 75, as the furnace was turned off during the installation) on the new one. Good to know.
The swap took about 20 minutes, and the only tool required was a screwdriver. Pretty simple.
Here's our old thermostat. It uses a coil-based temperature sensor, with a little mercury-filled tube switch. Twenty years ago, this one may have been accurate, but over time, the coils in these models lose tension.
The single most important step to follow when replacing a thermostat is that the wires need to be labeled. The packaging for the new thermostat made that quite clear; just about every page in the instruction manual mentioned it.
Here, you can see where the old thermostat circuit board is labeled. In this shot, you can easily see the RH, A, and the Y location. The wires going to these locations need to be labeled, as the colors of the wires have no bearing on anything; there apparently wasn't a universal wire-color scheme at the time these old thermostat were installed.
You can see that the wires here are labeled. It's also important that you prevent the wires from falling back into the wall. The manual suggested wrapping the wires around a pencil or stick. I tested my wires to see if they would sink in to the wall, but the way they were bundled prevented it.
The new thermostat has a location for each labeled wire. Very convenient. The unused terminals would be used if I had an air conditioner in the house.
And here's the new panel, installed. It turns out that 70 degrees on the old thermostat equals about 73 degrees (maybe as high as 74 or 75, as the furnace was turned off during the installation) on the new one. Good to know.
The swap took about 20 minutes, and the only tool required was a screwdriver. Pretty simple.

